Background
What is a Software Development Kit (SDK)? Put simply a set of tools, libraries and documentation to simplify interacting with a REST API. I am super excited, as I know how much simpler it is going to make developing scripts for the Cisco DNA Center API.
The Cisco DNA Center SDK is written in python and provides a python library in PyPI and associated documentation. PyPI is the official python package index, and simplifies installation of the library.
I am going to assume you are familiar with Cisco DNA Center API, so focus on installing and using the SDK.
Installing the Cisco DNA Center SDK
The SDK is available via PyPI, so all that is required is “pip install”
I would recommend using a virtual environment. This is optional, but means you do not require root access and helps keep different versions of python libraries separate. Once created, it needs to be activated, using the “source” command.
If you logout and back in, activation needs to be repeated.
python3 -m venv env3
source env3/bin/activate
To install:
pip install dnacentersdk
You are now able to use the SDK.
Using the Cisco DNA Center SDK
This is super simple. In the past, I needed lots of python code to get an authentication token, then wrap GET/PUT/POST/DELETE REST API calls.
Using the SDK is so simple, I am going to use the python REPL (the python interactive console). To start it, simply type “python” on the command line
$ python
python 3.7.2 (default, Jan 13 2019, 12:50:15)
[Clang 10.0.0 (clang-1000.11.45.5)] on darwin
Type "help", "copyright", "credits" or "license" for more information.
>>>
First create a connection to DNAC. Go into the REPL (above) and paste the following commands:
from dnacentersdk import api
dnac = api.DNACenterAPI(base_url='https://sandboxdnac2.cisco.com:443',
username='devnetuser',password='Cisco123!')
For this example, I am using the DevNet sandbox. If you want to use your own DNAC, just change the base URL and credentials. You might also require “verify=False” if you have a self signed certificate.
In the past this would have been complicated. I needed to get a token, and then make sure I used that token as a header for subsequent requests. This is all taken care of with the creation of the api.DNACenterAPI object.
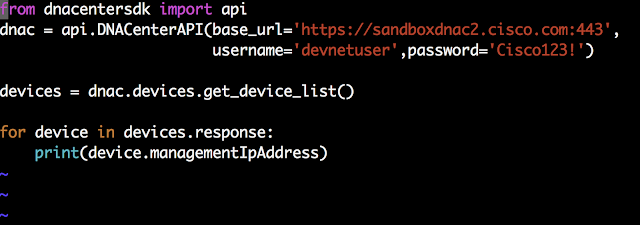
Now, for the first API call. This call gets all of the network devices, and the for loop prints out the managementIP address. Note that an object is returned, rather than a json structure.
devices = dnac.devices.get_device_list()
for device in devices.response:
print(device.managementIpAddress)
This shows all of the steps with their output
$ python
Python 3.7.2 (default, Jan 13 2019, 12:50:15)
[Clang 10.0.0 (clang-1000.11.45.5)] on darwin
Type "help", "copyright", "credits" or "license" for more information.
>>> from dnacentersdk import api
>>> dnac = api.DNACenterAPI(base_url='https://sandboxdnac2.cisco.com:443',
username='devnetuser',password='Cisco123!')
>>> devices = dnac.devices.get_device_list()
>>> for device in devices.response:
... print(device.managementIpAddress)
...
10.10.20.51
10.10.20.81
10.10.20.82
10.10.20.80
10.10.20.241
10.10.20.250
10.10.20.242
10.10.20.243
10.10.20.244
10.10.20.245
10.10.20.246
10.10.20.247
10.10.20.248
10.10.20.249
>>>
Documentation
How do you know what methods are available to call? Official documentation is available https://dnacentersdk.readthedocs.io/en/latest/api/api.html
The API is structured around groupings of endpoints. For example, all of the endpoints for network-devices are under “devices”. In the example above, dnac.devices.get_device_list() returns all network-devices.
You can also take advantage of python’s introspection capabilities.
In the example above, a dir(dnac) will return all of the properties and methods for the dnac object. The ones of interest are highlighted
>>> dir(dnac)
['__class__', '__delattr__', '__dict__', '__dir__', '__doc__', '__eq__', '__format__', '__ge__', '__getattribute__', '__gt__', '__hash__', '__init__', '__init_subclass__', '__le__', '__lt__', '__module__', '__ne__', '__new__', '__reduce__', '__reduce_ex__', '__repr__', '__setattr__', '__sizeof__', '__str__', '__subclasshook__', '__weakref__', '_session', 'access_token', 'authentication', 'base_url', 'clients', 'command_runner', 'custom_caller', 'devices', 'fabric_wired', 'file', 'network_discovery', 'networks', 'non_fabric_wireless', 'path_trace', 'pnp', 'session', 'single_request_timeout', 'site_profile', 'sites', 'swim', 'tag', 'task', 'template_programmer', 'verify', 'version', 'wait_on_rate_limit']
You can then use the help() function to get more information about the particular methods available. In the example below, help for dnac.devices will show a method of get_device_list() which returns all of devices in the inventory.
>>> help(dnac.devices)


0 comments:
Post a Comment